How to Photograph Water Droplets
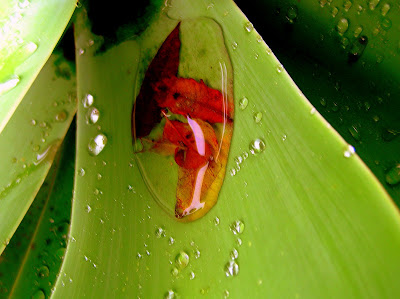
Today, I was going through some of my photo library - yes, the ones I can access and have saved correctly and came across this shot of droplets of dew again and decided to do a bit of surfing to see how others attack dew, water and water droplets and found this super cool article on How to Photograph Water Droplets by Brooks Carver that has some exciting ways to take water droplets that I wanted to share with you so you too can take incredible shots and awesome photographs. Here's the article:
Do you love taking pictures?

If so this is a new and exciting way to take awesome pics that will have your friends and family talking! The best part you can do this at any time of year, time of day, and you don't have to leave your home to do it! I will show you how to photograph water droplets for some down right amazing pics!
Your hardest task is going to be timing! Your best method is going to be trial and error. It does take some practice. After about a dozen shots you will start getting in sync with your camera and your amazing pics will be proof!
The other way is to use a sounds activated
or motion device that will automatically make the flash units trigger with a ingrate beam when it becomes broken from the falling drop! They are fun to use and seem to be affordable!
Creating your shape
1. Crown shapes- you need to fill the receptacle with liquid to about 1 centimeter or less.
2. Column shapes, your are going to need to add a tad more liquid.
Plain water works best so no need to waste your time trying anything else. Its very cost effective and is also very reflective!
Backgrounds
Have fun with this there are several different ways you could take it.
1. Go all black with a beautiful wine glass as your reciprocal.
2. Use bright fun colors underneath your receptacle, it gives them a fun up beat effect!
3. Try placing some colorful stones in the bottom.
4. Wrapping paper works great, make sure you receptacle is in contrasting colors to really make it pop out at you.
You can also purchase some high gloss photos, but why pay when you can make your own!
Its your photograph customize it to your liking!
At about 120 degrees water drops will reflect a given area. Your background doesn't have to be huge since it is only going to be sitting about 3 inches behind the receptacle.
Start by mounting your camera on a tripod in front of your setup. Using your viewfinder, make sure you background color is reflecting strongly off the water. Try using a piece of magazine as a target to get your camera ready for focus. I stick with using an aperture of f/4-f/4.5 to make sure the depth of field is still keeping the drop sharp while still blurring the background.
Make sure your set up is well and equally lit, then dim the room lights. Set your shutter for about 3-5 seconds,
I have found that an eye dropper works best for making a drip.
Squeeze out a drip, and start by manually flashing, which will then cause all to fire in tandem. Then continue till you achieve your desired result!
I hope you now have learned how to photograph water droplets and are well on your way to making stunning pics to show to your family and friends!
Check out my site about Antique Cuckoo Clocks they are beautiful. I also have some info on Anton Schneider Cuckoo Clock
Article Source: http://EzineArticles.com/?expert=Brooks_Carver
Do you love taking pictures?

If so this is a new and exciting way to take awesome pics that will have your friends and family talking! The best part you can do this at any time of year, time of day, and you don't have to leave your home to do it! I will show you how to photograph water droplets for some down right amazing pics!
Your hardest task is going to be timing! Your best method is going to be trial and error. It does take some practice. After about a dozen shots you will start getting in sync with your camera and your amazing pics will be proof!
The other way is to use a sounds activated
or motion device that will automatically make the flash units trigger with a ingrate beam when it becomes broken from the falling drop! They are fun to use and seem to be affordable!
Creating your shape
1. Crown shapes- you need to fill the receptacle with liquid to about 1 centimeter or less.
2. Column shapes, your are going to need to add a tad more liquid.
Plain water works best so no need to waste your time trying anything else. Its very cost effective and is also very reflective!
Backgrounds
Have fun with this there are several different ways you could take it.
1. Go all black with a beautiful wine glass as your reciprocal.
2. Use bright fun colors underneath your receptacle, it gives them a fun up beat effect!
3. Try placing some colorful stones in the bottom.
4. Wrapping paper works great, make sure you receptacle is in contrasting colors to really make it pop out at you.
You can also purchase some high gloss photos, but why pay when you can make your own!
Its your photograph customize it to your liking!
At about 120 degrees water drops will reflect a given area. Your background doesn't have to be huge since it is only going to be sitting about 3 inches behind the receptacle.
Start by mounting your camera on a tripod in front of your setup. Using your viewfinder, make sure you background color is reflecting strongly off the water. Try using a piece of magazine as a target to get your camera ready for focus. I stick with using an aperture of f/4-f/4.5 to make sure the depth of field is still keeping the drop sharp while still blurring the background.
Make sure your set up is well and equally lit, then dim the room lights. Set your shutter for about 3-5 seconds,
I have found that an eye dropper works best for making a drip.
Squeeze out a drip, and start by manually flashing, which will then cause all to fire in tandem. Then continue till you achieve your desired result!
I hope you now have learned how to photograph water droplets and are well on your way to making stunning pics to show to your family and friends!
Check out my site about Antique Cuckoo Clocks they are beautiful. I also have some info on Anton Schneider Cuckoo Clock
Article Source: http://EzineArticles.com/?expert=Brooks_Carver

Comments
- Norman